
There’s nothing quite like the smell of homemade bread baking in the oven! If you’ve been searching for a homemade gluten-free sandwich bread, this Gluten-Free Double-Milk Sandwich Bread is a delicious recipe to add to your baking list. Made with King Arthur Gluten-Free Measure for Measure flour, milk, butter, eggs, and yeast, this loaf is a wonderful option for everyday meals.
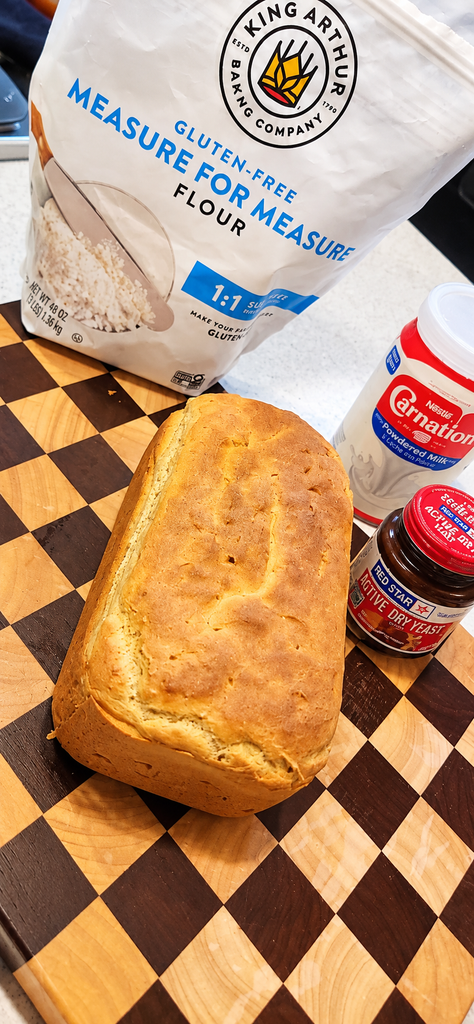
When I made this bread, I used Red Star Active Dry Yeast instead of instant yeast. I let the batter rise for 30 minutes for the first rise and another 60 minutes after transferring it to the loaf pan. I baked it at 350°F for 40 minutes, until the loaf had a beautiful golden-brown crust.
Living gluten-free because of celiac disease has taught me how important it is to have recipes that make everyday meals easier and more enjoyable. At Gluten Free Sami, I love sharing the recipes, products, and tips that help make gluten-free living feel less overwhelming. Homemade bread can take a little patience, but making your own loaf is a rewarding way to enjoy a familiar favorite.
Why You’ll Love This Gluten-Free Sandwich Bread
One of the best things about homemade bread is knowing exactly what goes into your loaf. This recipe uses gluten-free flour and familiar baking ingredients to create a homemade alternative to store-bought sandwich bread.
It’s also versatile! You can slice it for sandwiches, toast it for breakfast, or serve it alongside your favorite soup. Once the loaf has cooled completely, you can cut it into slices and enjoy it throughout the week.
Another thing I love about this recipe is that it uses King Arthur Gluten-Free Measure for Measure flour. Using the flour specified in the recipe gives you a consistent starting point when making this loaf at home. Different gluten-free flour blends can behave differently, so I recommend following the ingredient list as written for your first attempt.
Ingredients You’ll Need
You’ll need King Arthur Gluten-Free Measure for Measure flour, nonfat dry milk powder, sugar, yeast, salt, lukewarm milk, softened butter, and eggs.
The combination of milk and dry milk powder is what gives this recipe its double-milk name. The butter and eggs are also important ingredients in the batter.
For my loaf, I used Red Star Active Dry Yeast rather than instant yeast. I used 1 teaspoon of active dry yeast, so keep in mind that my version differs from the original recipe, which calls for instant yeast.
Be sure to measure your ingredients carefully. Weighing the flour is especially helpful when baking gluten-free bread because it helps you use the intended amount consistently.
How to Make Gluten-Free Double-Milk Sandwich Bread
Start by combining the gluten-free flour, dry milk powder, sugar, yeast, and salt in a mixing bowl. Gradually beat in the lukewarm milk, then add the softened butter and eggs one at a time.
Beat the mixture on medium speed for three minutes, scraping down the sides of the bowl as needed. The batter should be thick and smooth. Unlike traditional wheat bread dough, this mixture is not intended to be kneaded by hand.
Cover the bowl and let the batter rise for 30 minutes. Next, grease an 8½ × 4½-inch loaf pan and transfer the batter into it. Smooth the top with wet fingers or a spatula.
Cover the pan and let the bread rise for another 60 minutes, as I did when making mine. Watch the loaf as it rises, aiming for it to barely crown above the rim of the pan.
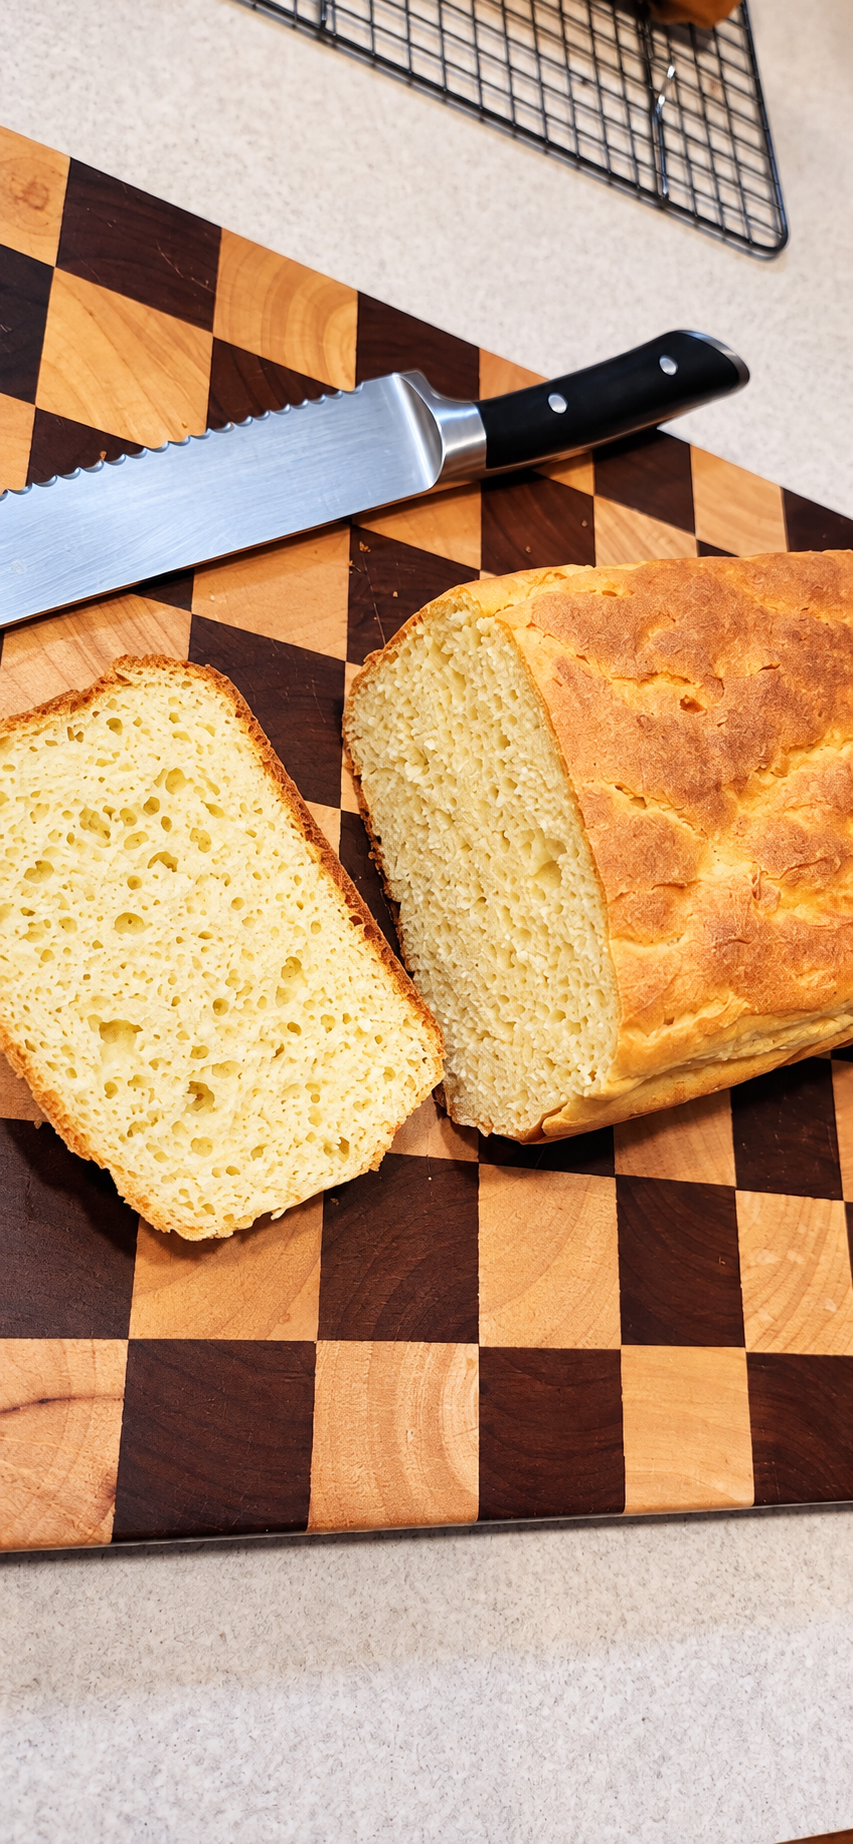
Bake at 350°F for 40 minutes, until the loaf is golden brown. For an additional doneness check, the original recipe recommends that the center reach at least 200°F. If it hasn’t reached that temperature after 40 minutes, continue baking as needed.
Once baked, remove the loaf from the pan and transfer it to a wire rack. Let it cool completely before slicing.
Tips for the Best Results
Measure your flour carefully. Use the specified King Arthur Gluten-Free Measure for Measure flour and weigh it if possible.
Pay attention to the rise. Rising times can vary depending on the yeast and the temperature of your kitchen. Look at the loaf’s height during the second rise rather than relying on the clock alone.
Don’t add extra flour. This recipe produces a thick, smooth batter rather than a traditional kneadable dough. Follow the listed measurements instead of adding flour to change the consistency.
Check the center temperature. A golden crust is a helpful visual sign, but checking the internal temperature gives you another way to assess doneness.
Let the bread cool completely. It’s tempting to slice fresh bread while it’s still warm, but cooling helps the loaf finish setting and makes slicing easier.
What to Serve With Homemade Gluten-Free Bread
This loaf is perfect for everyday meals. Use it to make your favorite sandwiches, toast a slice for breakfast, or serve it with a bowl of homemade soup. You can also enjoy a slice with butter or your favorite spread.
Try slicing the cooled loaf evenly so your pieces are ready for lunches and breakfasts. Choose your favorite toppings and make this bread part of your regular gluten-free meal rotation.
Frequently Asked Questions
Can I use active dry yeast instead of instant yeast?
I used Red Star Active Dry Yeast for my loaf. My version uses 1 teaspoon, while the original recipe specifies instant yeast. Yeast types can behave differently, so rising times and results may vary.
How long does the bread need to rise?
My loaf had a 30-minute first rise and a 60-minute second rise. The second rise should also be guided by the loaf’s height.
How do I know when the bread is done?
The loaf should be golden brown. The original recipe recommends checking that the center reaches at least 200°F.
Can I slice the bread while it’s warm?
It’s best to wait until the loaf has cooled completely on a wire rack before slicing. This helps the bread finish setting and improves the slicing experience.
Let’s Bake Together!
I hope this Gluten-Free Double-Milk Sandwich Bread gives you another delicious homemade option for your gluten-free kitchen. Baking gluten-free bread can take a little practice, but every loaf is an opportunity to learn what works best in your kitchen.
If you try this recipe, I’d love to hear how it turns out! Leave a comment or rating and share what you enjoy making with your homemade bread.
Happy gluten-free baking!
— Sami
Gluten Free Sami
Gluten-Free Double-Milk Sandwich Bread
Ingredients
Equipment
Method
- In a mixing bowl, combine the gluten-free flour, nonfat dry milk powder, sugar, active dry yeast, and salt.360 g King Arthur Gluten-Free Measure for Measure flour, 35 g nonfat dry milk powder, 25 g sugar, 1 teaspoons active dry yeast*, 1 teaspoon salt
- Gradually beat in the lukewarm milk until incorporated.170 g lukewarm milk
- Add the softened butter. Beat in the eggs one at a time, scraping down the sides of the bowl as needed.57 g softened butter, 4 large eggs
- Beat on medium speed for 3 minutes until the mixture forms a thick, smooth batter.
- Cover the bowl and let the batter rise for 30 minutes.
- Grease an 8½ × 4½-inch loaf pan. Transfer the batter into the pan and smooth the top with wet fingers or a spatula.
- Cover the pan and let the batter rise for approximately 30-60 minutes, as I did when making this loaf. Watch the bread as it rises; the original recipe describes the target as barely crowning above the rim of the pan.
- Preheat the oven to 350°F (175°C), if you haven’t already. Bake the bread for 40 minutes, as I did, until the loaf is golden brown.
- For a reliable doneness check, the original recipe recommends an internal temperature of at least 200°F. If the center has not reached that temperature after 40 minutes, continue baking and check again.
- Remove the loaf from the pan and transfer it to a wire cooling rack. Let the bread cool completely before slicing for the best texture.
Notes
- Yeast: I used 1 teaspoon of Red Star Active Dry Yeast instead of the instant yeast listed in the original recipe.
- First rise: Let the batter rise for 30 minutes.
- Second rise: Let the batter rise in the loaf pan for 30-60 minutes, or until it barely crowns above the rim of the pan.
- Baking: Bake at 350°F for 40 minutes, checking that the center reaches at least 200°F. If needed, continue baking until it reaches that temperature.
- Cooling: Remove the loaf from the pan and cool completely on a wire rack before slicing.
- Flour: Use King Arthur Gluten-Free Measure for Measure flour as listed.
- Gluten-free safety: Check ingredient labels and use clean utensils and equipment to prevent gluten cross-contact.